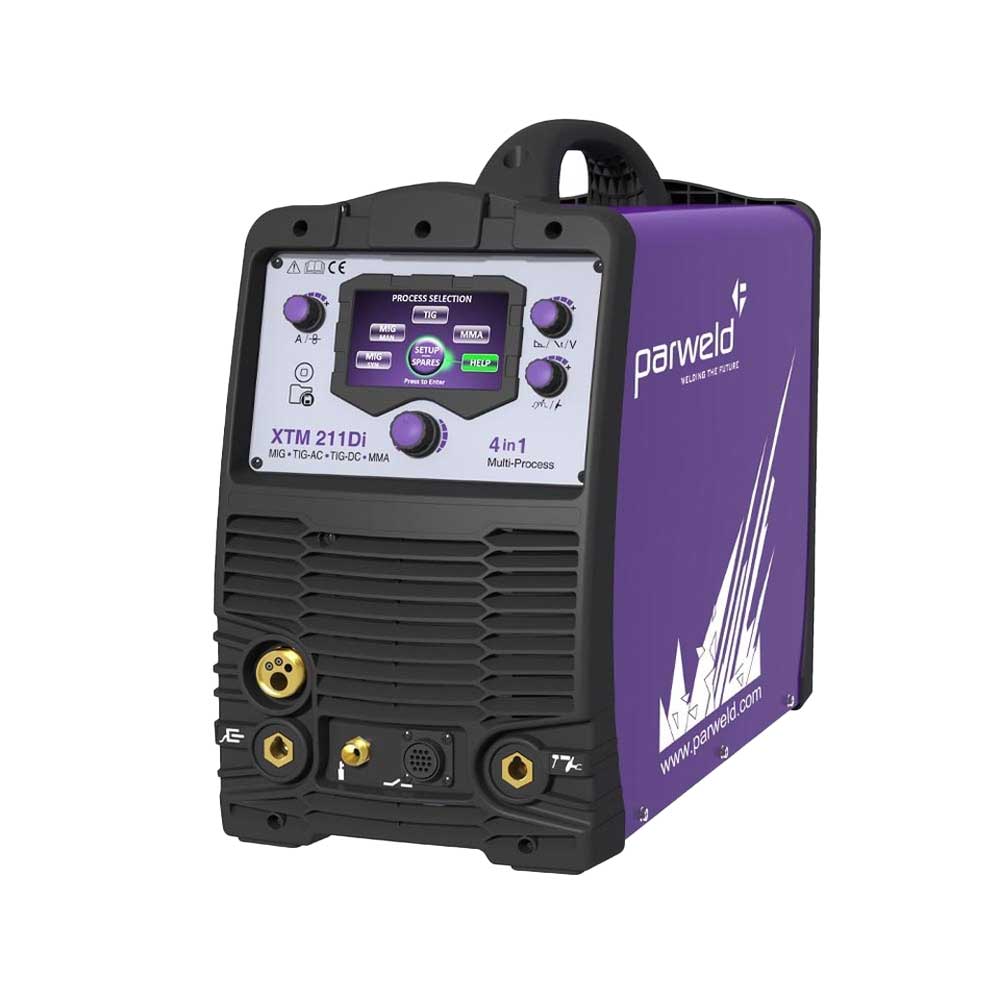

New onto the market is the latest offering from Parweld, the XTM 211DI Multiprocess Inverter. It's pretty unique, in that its a compact multiprocess inverter with AC/DC TIG capabilities.
FUNCTIONS
It's pretty much everything a one-person engineering shop would want, apart from a plasma cutter. But is it any good?
The one downside in a production shop with an all in one welder is that if you get an electronics problem, then your pretty much stuck and can't do any welding at all. The advantages, though could far outway the issues.
I see this machine in maintenance shops and factories where a compact machine that can be carried to that pipework weld on the factory floor would be useful.
FIRST IMPRESSIONS
On first viewing the Parweld XTM 211 Di, I'm impressed by its size. Technical dimensions are 615 x 275 x 495mm, and it looks sizeable when you first see it. The front is nicely protected with the large black plastic bumpers, wrapping around all the soft bits to safeguard them. The plastics feel good and not cheap and brittle.
One thing you will notice is the fan; it kicks in when you start welding, and its a little noisy. but apart from that, alls good

The Case panel thickness is good, giving the unit a sturdy feel, and the door opening to access the wire feeder is large.
Inside you will find an industrial quality wire spool holder capable of taking a 15kg spool. There is also a sturdy, metal wire feeder, single drive roll.
The unit is fitted with a euro adapter connection meaning its compatible with all the different makes and models of professional torches.
Speaking of torches, included in the box are a pair of Parweld current control MIG and a TIG torches.


The TIG Torch is particularly useful as it enables you to adjust the current quite easily while welding. I like the torches also;, the rubber used on the handles gives a great grip; the buttons are large enough and protrude enough so that you can still feel and adjust them even with gloves on.

CONTROL
There is a large control knob in the center of the panel. It has a push function, and this is what controls and selects the settings.
If you press the knob for 5 seconds, it will return you to the start screen as (process control), as shown above.
The settings available are MIG Synergic, MIG Manual, TIG, and MMA. There is also a good help menu.
The pictures below show the different functions, and I still have the protective sticker on the screen, the display is sharp, and the graphics look okay.
From the start, the settings are pretty straight forward, and you need to select the process, material, wire size, gas, and trigger function to obtain your synergic setting.

Select MIG SYNERGIC or TIG if desired.

Then the Material you want to weld, I chose FE (Steel).

Gas Used.

Then your wire thickness.
Control type selection means trigger function, 2T is a normal trigger on/off, and 4T is the latch.

I nice graphic then pops up, showing you the thickness of the material to be welded. Choosing a thickness gives you the optimum settings for that thickness, as determined by the professional welder who created the program at the factory.

If you then press the button one more time, it brings you to the normal display, showing all of your synergic parameters.

HELP MENU
The help menu contains the torch, MIG burnback, factory reset, machine software version, spares, and language controls
The Bluetooth control enables you to control the welder via an app on your phone, which is pretty neat. The app brings up the controls and allows you to alter the welding current etc.
Another great little addition is spares control. In here, it shows you what spares consumables, and part numbers are required for the torches.
MIG WELDING
MIG welding with the XTM211 was as I expected from an inverter. The start of the weld was smooth, and spatter was controlled. The arc, although not the smoothest I've used for an inverter, for a machine at this cost it was good. The controls at the side of the screen for wire feed speed and voltage enabled me to "fine-tune" the settings to my liking quickly and easily. The main problem welding thin materials with an inverter is the start. Lower quality machines tend to "pop" at the beginning, and this can exacerbate blowing holes in a quarter panel. It also makes welding rusty panels more difficult. The Parweld XTM 211 DI Performed well here, giving a crips start with hardly any pop.
TIG WELDING
Selecting the TIG function brings up a screen for auto or manual. I chose the manual, which brings up the synergic graph. I then fine-tuned my pre-start current, slope, downslope, and post flow gas. I also set the cleaning effect.
Getting out a cracked alloy wheel, I started to weld at about 140 amps, a setting I set on other models of welder for this type of job.
The current was smooth and consistent and made quick work of the job.
CONCLUSION
The Parweld XTM211DI performed admirably in all areas for a multiprocess machine giving the aluminium TIG welding option.
I loved the control interface, its clean and easy to understand.
It seems well made and has a quality two roll wire feed unit, although I wish it were four rolls.
It's powerful, and as a multiprocess option, I think I would have it in my workshop and be very happy. The other feature that pleased me was the 3+3 warranty. This is a three-year return to base warranty with an optional extra three years if the machine is serviced every year.
For most buyers, this could be a deal-breaker.
Comments will be approved before showing up.